Tutorial on working with Flumo
Before you get started, you will need the following:
2. A bowl to drain your molds in. (An old plastic one will do)
3. A container with a spout, which you can pour your Flumo or Liquache from.
4. An old spoon or stick for stirring in paint and mixing your medium thoroughly.
Paints used:
Liquache is a grayish white in colour, Flumo comes in white and also in pre-coloured skin tones. I prefer using white because I like to mix my own skin tones, and the subtle variation that creeps into the various batches makes each doll unique. Although one can use regular craft acrylic paint, I prefer using Jo Sonja's Acrylic Gouache in Provincial Beige, Fawn, Skin Tone Base and Burnt Sienna. Although I use very little of the Skin Tone Base shade, it is good for keeping on hand in case one mixes a colour which is too dark or a shade which you later want to lighten. Jo Sonja's paints can be found at http://www.jerrysartarama.com/discount-art-supplies/online/1357/art-supplies/4.

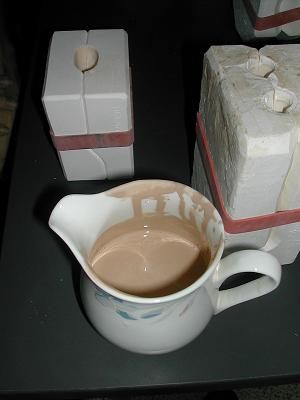
Now please remember that both Flumo and Liquache lighten as they dry. But Liquache lightens considerably. For Flumo an iced-coffee (coffee mixed with milk) shade would work. You can see the colour my slip is in the following picture. For Liquache you would need to go a few shades darker, experimenting by letting a drop of it dry to see if you like the shade.
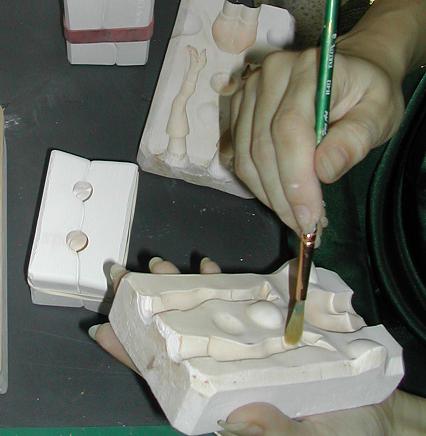
Now, get out your mixing bows, spoon and Flumo or Liquache as the case may be. A couple of heaped tablespoons of either medium should suffice for one doll, but I usually mix batches of colour which take me through a few dolls at least. Although it is recommended one use distilled water, I get by with ordinary tap water, (but I should mention that where I live, ordinary tap water is well water) so perhaps you may be better off using the distilled water as recommended. Basically what you need to do is get the Flumo/Liquache, paints and water mixed thoroughly, the colour being one you can be happy with and the consistency being that of thick milk. No doubt several air bubbles will have crept into the mixture, so leave it for a while to settle. In the case of Flumo, I find straining the slip a great help in getting rid of air-bubbles. I tried straining Liquache, but got a bit of a pulpy mass in the strainer, so either you can use a strainer with slightly larger holes or dispense with it altogether. You can also blow on the bubbles to pop them as they start to rise to the surface of the mixture. Once you are bubble-free and have a smooth, well blended, pourable mixture, pour it into your container and stir it carefully a few times to ensure it is thoroughly mixed. Now you can begin to pour your molds.
Pouring your molds:
Pouring must be done confidently and in one continuous stream and right up to the top of the pour hole. Pouring slowly but NOT in fits and starts works well. It is said that pouring in fits and starts results in rings showing up in your work, but I've managed to do this correctly and so will you!! It's not rocket science *grins*.
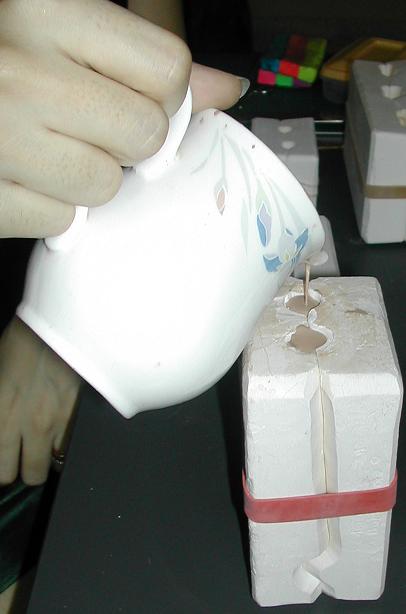
Once your molds have been poured right to the top, leave them to one side to settle for a few minutes. During this process you will notice that the Flumo/Liquache slip gets sucked into the center of the mold, leaving a wall all around. This is clear in the molds in the following picture.
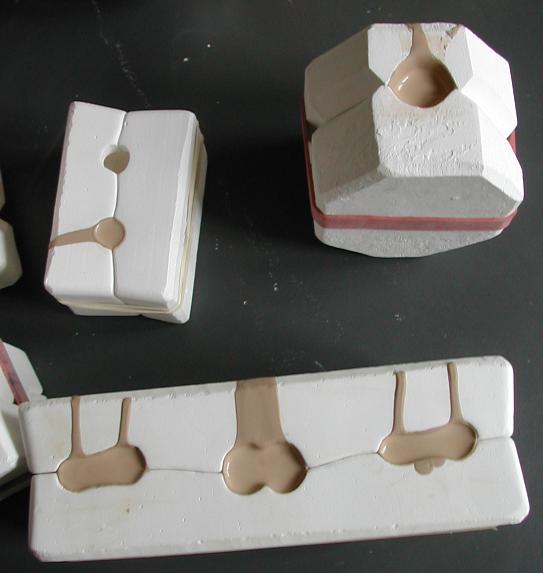
When the wall is approximately 1 or 2 mm in thickness, (for my climatic conditions, this takes about 5 to 10 minutes) it's time to drain the molds.
Draining your molds:
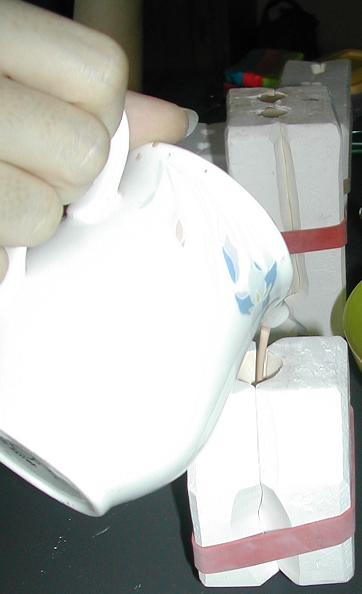
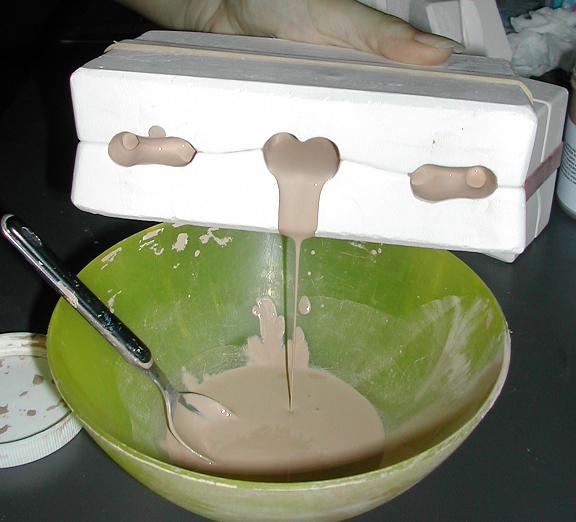
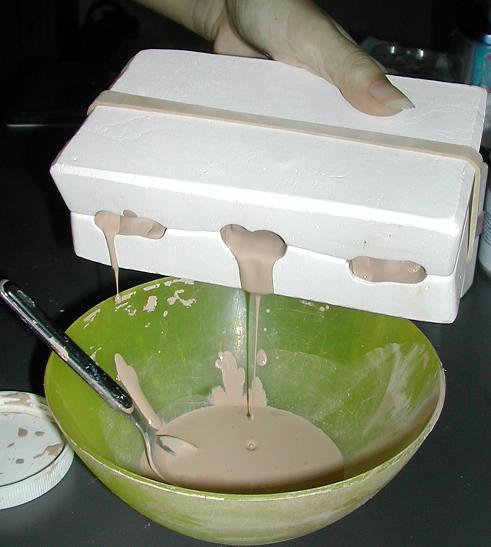
Draining is a lot like pouring, but in the reverse. As long as you drain slowly and don't make any sudden movements you should be fine. Start by slowly tilting your mold over your mixing bowl, gradually increasing the angle as you proceed. The following pictures illustrate this:
Once your molds have been drained thoroughly, keep them aside for a minute or two. You will know your molds have drained, if your casting seems hollow. Sometimes, in the case of narrow sections like arms, drainage does not occur easily. If this happens, with your mold tipped over, insert a small thin straw into the pour hole (be careful not to touch the slip) and gently blow, thereby displacing any blockages and allowing the slip to smoothly flow out. Now is a good time to play "Kill the Bubbles", a little game I've devised to make draining entertaining. Basically when your slip drains out, you will get a few bubbles in the mixing bowl, I try to kill those by trying to drain the slip over those bubbles. Try it, it's fun!!
NOTE: The amount of time one has to wait before draining a mold depends largely on your climatic conditions. So wall thickness is the best gauge for you.